Nocto - Part Two - Flashing Our Image
Side note
To start off with, I have had some issues flashing with fedora. So I changed my host to Ubuntu 22.04 and it works like a charm. You can keep everything the same or tweak it, your call.
Description
In this part we will tidy up with a base sato install just to make sure our flash is working before we add our custom application. Keep in mind, you will not have access to anything but your application. After that we can add valgrind(or MET), OTA updates to just update our app and maybe add some mock and tests with gtest and gmock.
Nocto - Part Two - Flashing
This will be somewhat of a short post as this is quite straight forward. All we need to do is to go to where our image was create, move that to a better destination, untar it and flash it to our board. Some issues arose with Fedora 37 and 38 so I recommend utilizing Ubuntu 22.04 as that worked for me. After we have built our Nocto image we should navigate to our build directory but here is a tree for reference:
mkdir ~/tegraflash
cp /build/tmp/deploy/images/jetson-nano-2gb-devkit/core-image-sato-jetson-nano-2gb-devkit.tegraflash.tar.gz ~/tegraflash
cd ~/tegraflash
tar -xvf core-image-sato-jetson-nano-2gb-devkit.tegraflash.tar.gz
rm -rf core-image-sato-jetson-nano-2gb-devkit.tegraflash.tar.gz #let's keep it clean here
After we untar everything we get a list of boot images and bin files as well as a storage partition and some scripting files. We need to setup our nano devkit in order to accept a flash over USB. We could do it through the sd card but there are some issues and it may not pickup the sdcard at all. Let's take a look at our directory first, btw I am using tree and it is somewhat good for listing files in depth for example:
tree ~/ -d -L 2 | grep dirname
This will print out our user directory and only show directories at a depth of 2 and to even make it cleaner we look for a specific dirname just to be sure it exists in the first place. There are other ways to keep it even cleaner but for now we can move on to flashing. Directory looks like below after we untar:
- l4t_bup_gen.func -> A helper file that contains all BUP generation related functions.
- BMP_generator_L4T.py -> Creates bmp.blob, using a configuration file as input.
- tegradevflash -> Bootloader device communication library.
- tegrabct -> BCT operation helper binary.
- mkbctpart -> Tool for boot configuration table partition.
- warmboot.bin -> Warm boot binary.
- cboot.bin -> CPU binary to load the kernel. It also supports Fastboot, charging, and display.
- nvtboot_rb.bin -> Jetson boot-specific Bootloader binary (AVP Bootloader, microboot, miniloader).
- flash.xml.in -> Layout for all of the files of the SPI.
- generate_bup_payload.sh -> Inits BUP payload.
- tegrasign_v3_util.py -> Python helper script for signing and encryption.
- cboot_rb.bin -> Second-stage bootloader software component for Jetson Nano.
- mkbootimg -> Tool for img creation.
- dosdcard.sh -> Flashes SD Card image.
- tegraopenssl -> Interface code for OpenSSL.
- core-image-sato.ext4 -> Sato storage partition.
- tegrahost -> Bootloader encryption binary.
- mkpkc -> Make private key.
- tegra210-flash-helper.sh
- boot.img -> A u boot binary.
- eks.img -> An encrypted key set.
- tegraparser -> Parses partition configuration, common BCT configuration, fuse bypass configuration and NVIDIA Configuration Table (NCT).
- tos-mon-only.img -> Secure-world software image (ARM® Trusted Firmware).
- bsp_version -> Jetson Linux BSP release version information.
- jetson-nano-2gb-devkit.cfg -> Configuration file for Jetson Nano 2GB to flash QSPI-NOR and microSD card.
- sc7entry-firmware.bin -> Binary to help system enter low power state.
- tegra210-p3448-0003-p3542-0000.dtb -> T210-specific DTB file.
- rp4.blob -> XUSB firmware.
- tegrasign_v3_internal.py -> Python helper script for signing and encryption.
- flashvars -> Options to create a customized system based on a specified machine.
- nvtboot.bin -> Jetson boot-specific Bootloader binary (AVP Bootloader, microboot, miniloader).
- nvtboot_cpu.bin -> CPU part of TegraBoot for TLK hand over transition.
- nvtboot_recovery.bin -> AVP bootrom applet binary used by TegraFlash.
- tegrasign -> TegraSign creates signature data for PKC operating mode and hash, and encrypted data for SBK operating mode.
- odmsign.func -> Fix failure with secureboot PKC keys.
- tegrarcm -> BootROM RCM communications binary.
- doflash.sh -> Flash util for over USB.
- mksparse -> Sparse image flashing with Bootloader.
- bmp.blob -> Three bmp image files for splash screen.
- tegraflash.py -> Default flashing application used for flashing Jetson devices with Jetson Linux.
- mkgpt -> Tool that encodes both primary and secondary GPT into flashable binary image files.
- nvtboot_cpu_rb.bin -> First-stage bootloader component that runs on the CCPLEX.
- chkbdinfo -> Provides board information.
- tegrasign_v3.py -> Python script for signing and encryption.
- make-sdcard -> Tool to create an SD card image.
- tegraflash_internal.py -> Helper implementation API script for tegraflash.py.
- nvflashxmlparse -> Parses the flash xml file.
- BUP_generator.py -> A utility that generates final BUP bl_update_payload from input rollback.bin and an entry list.
You can take a peek at the documentation and find the Package Manifest to get a better grasp on things, like boot processes, OTA updates(will be adding later), etc.
Flashing
We can do one of two things or even both here. One we can use dosdcard.sh to create and flash an image to an sdcard. Two we can flash over USB with doflash.sh . The easiest one has been doflash.sh as it doesn't need anything extra to flash correctly. Just need to do this in 3 easy steps:
1 - Power off the Jetson Nano 2GB Devkit if it isn't already and boot into recovery mode.
2 - Check that it is in recovery mode and correctly detected by your host machine.
3 - Flash your new setup onto the jetson nano.
4 - Power it on and check it out.
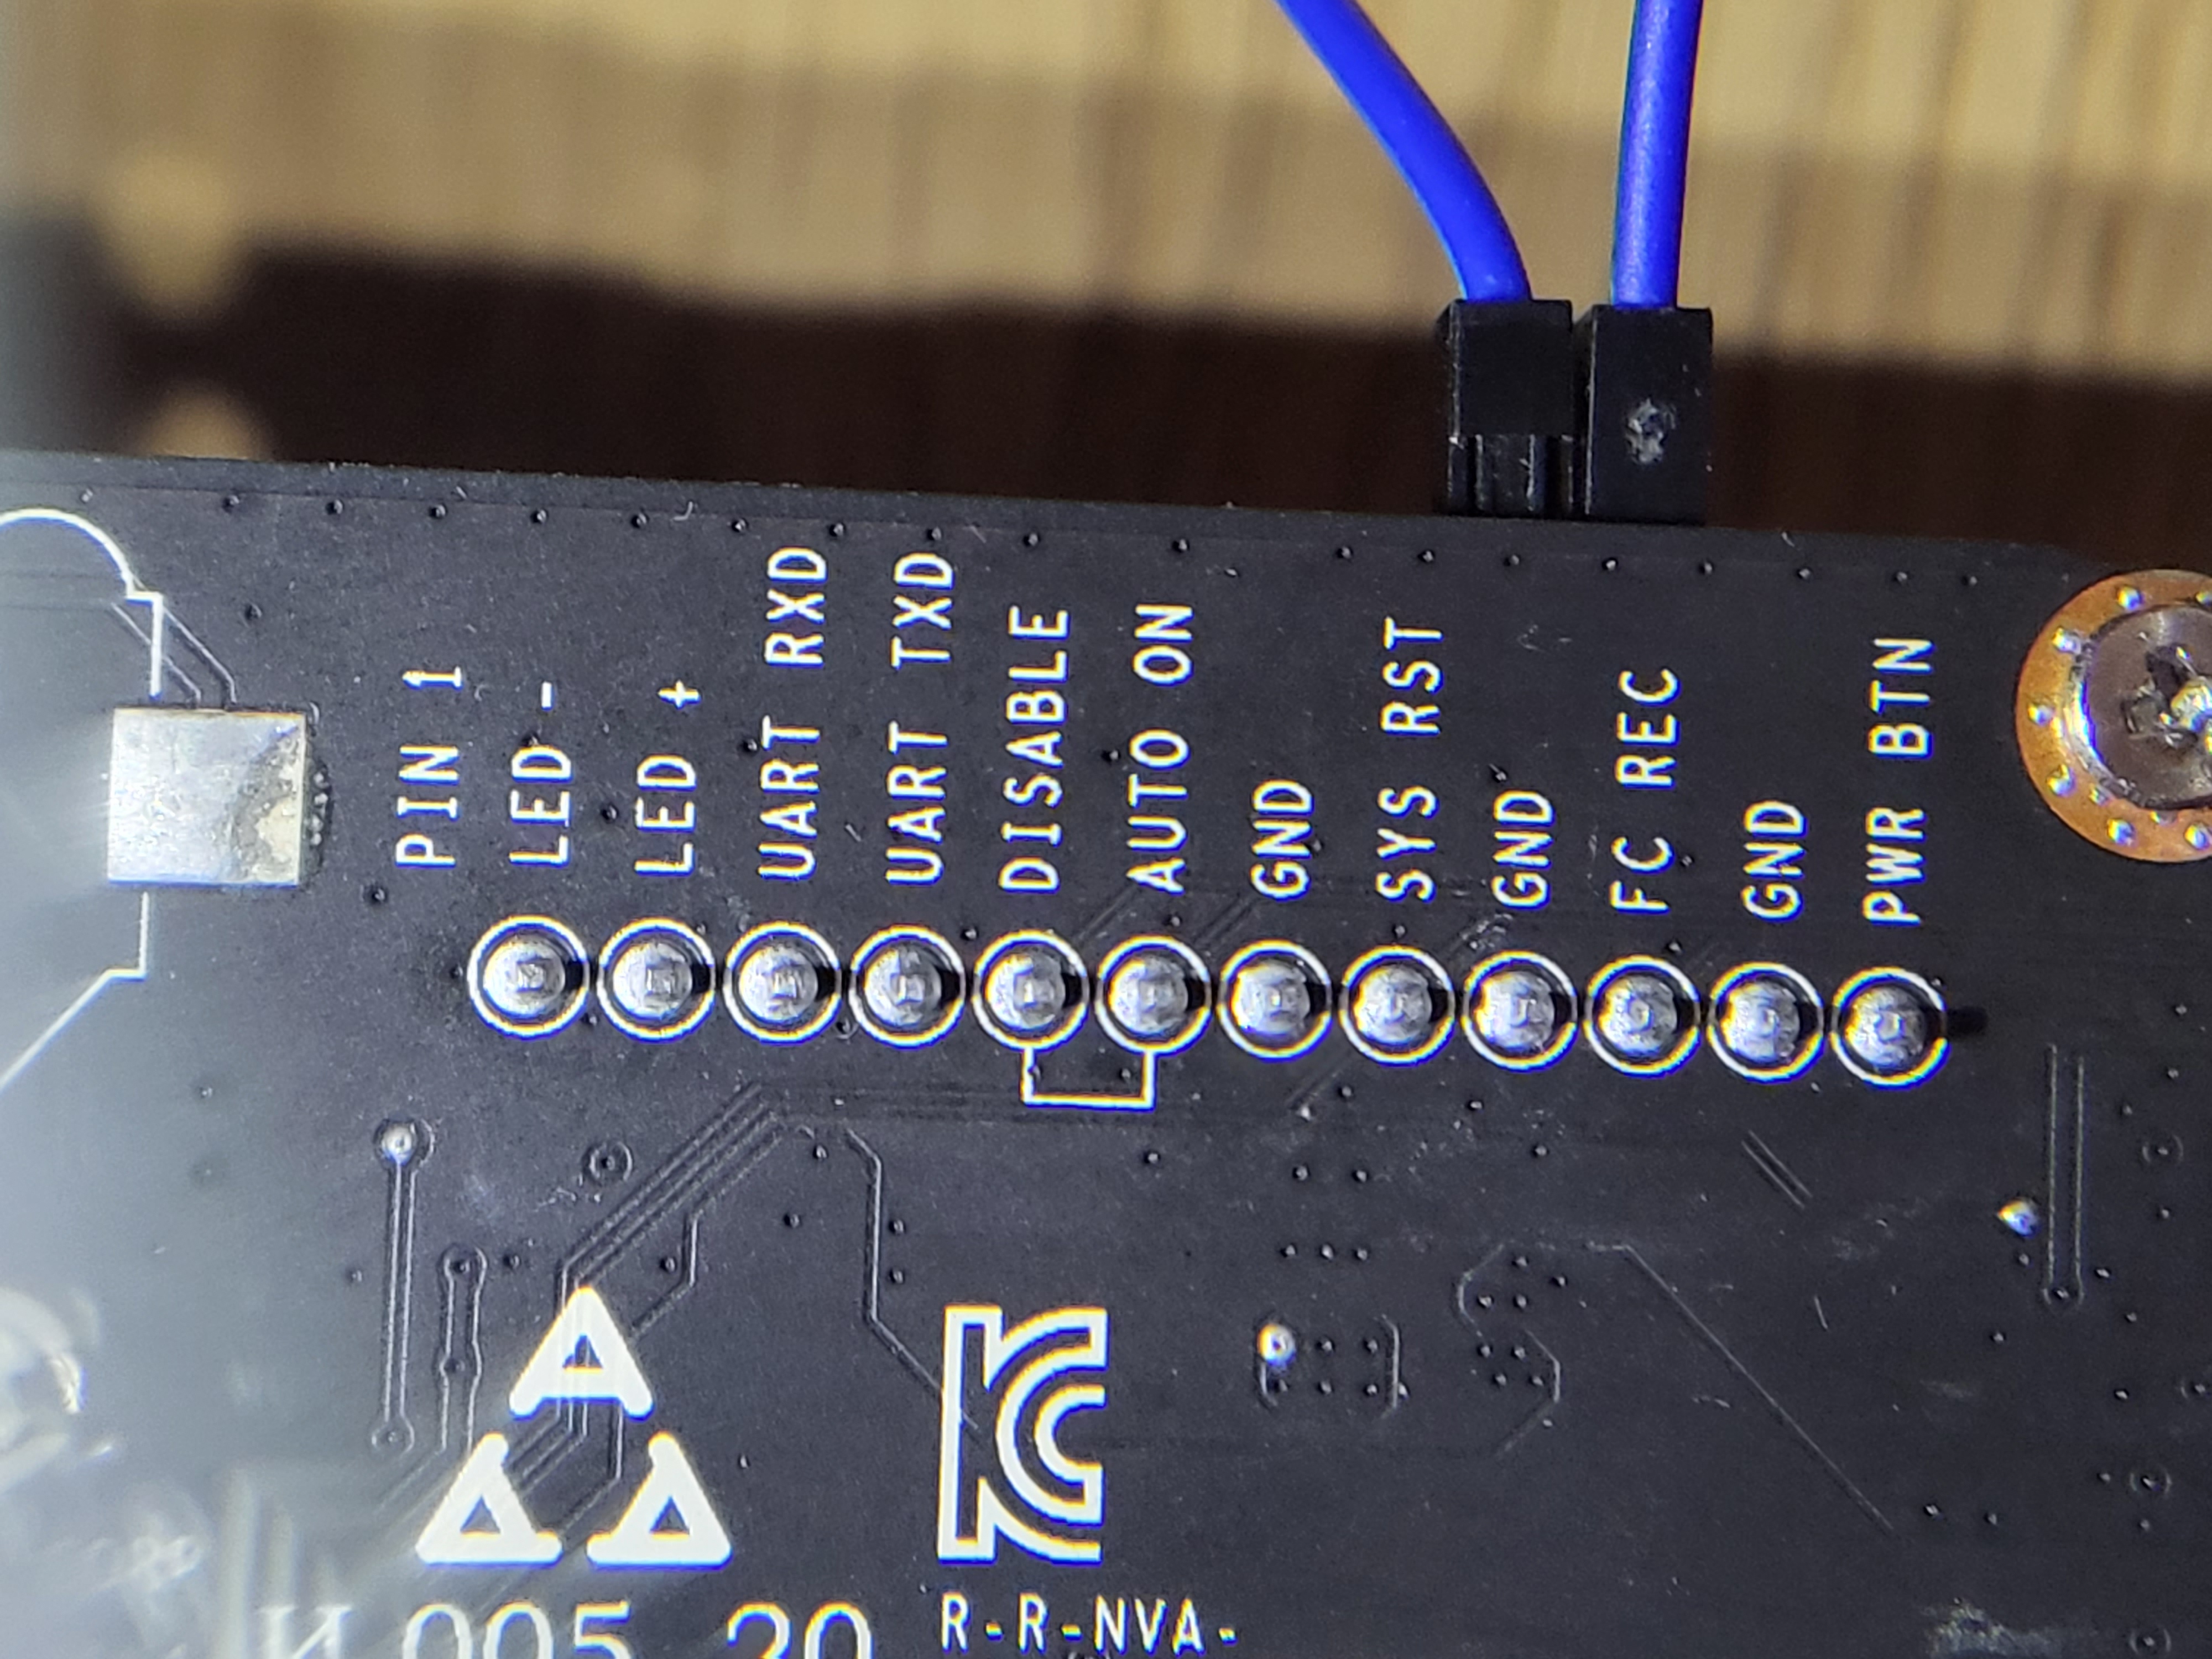
Power off the Jetson Nano
To begin, the jetson nano needs to be completely turned off and disconnected from your host machine. I would recommend not removing the power source until it is off by either connected a button to the pwr and gnd pins or do a shutdown now approach. We then need to cause a bit of a forced recovery mode here. I might add some peripherals with buttons on it to later do things like this but for now we just have to jerry rig it a bit. If you have a jumper cable or a jumper cap those will do just fine. You can even, when you power it on, short it by touching the GND pin to the FC REC pin with a screwdriver or something similar. We just need it to boot into recovery mode for flashing:
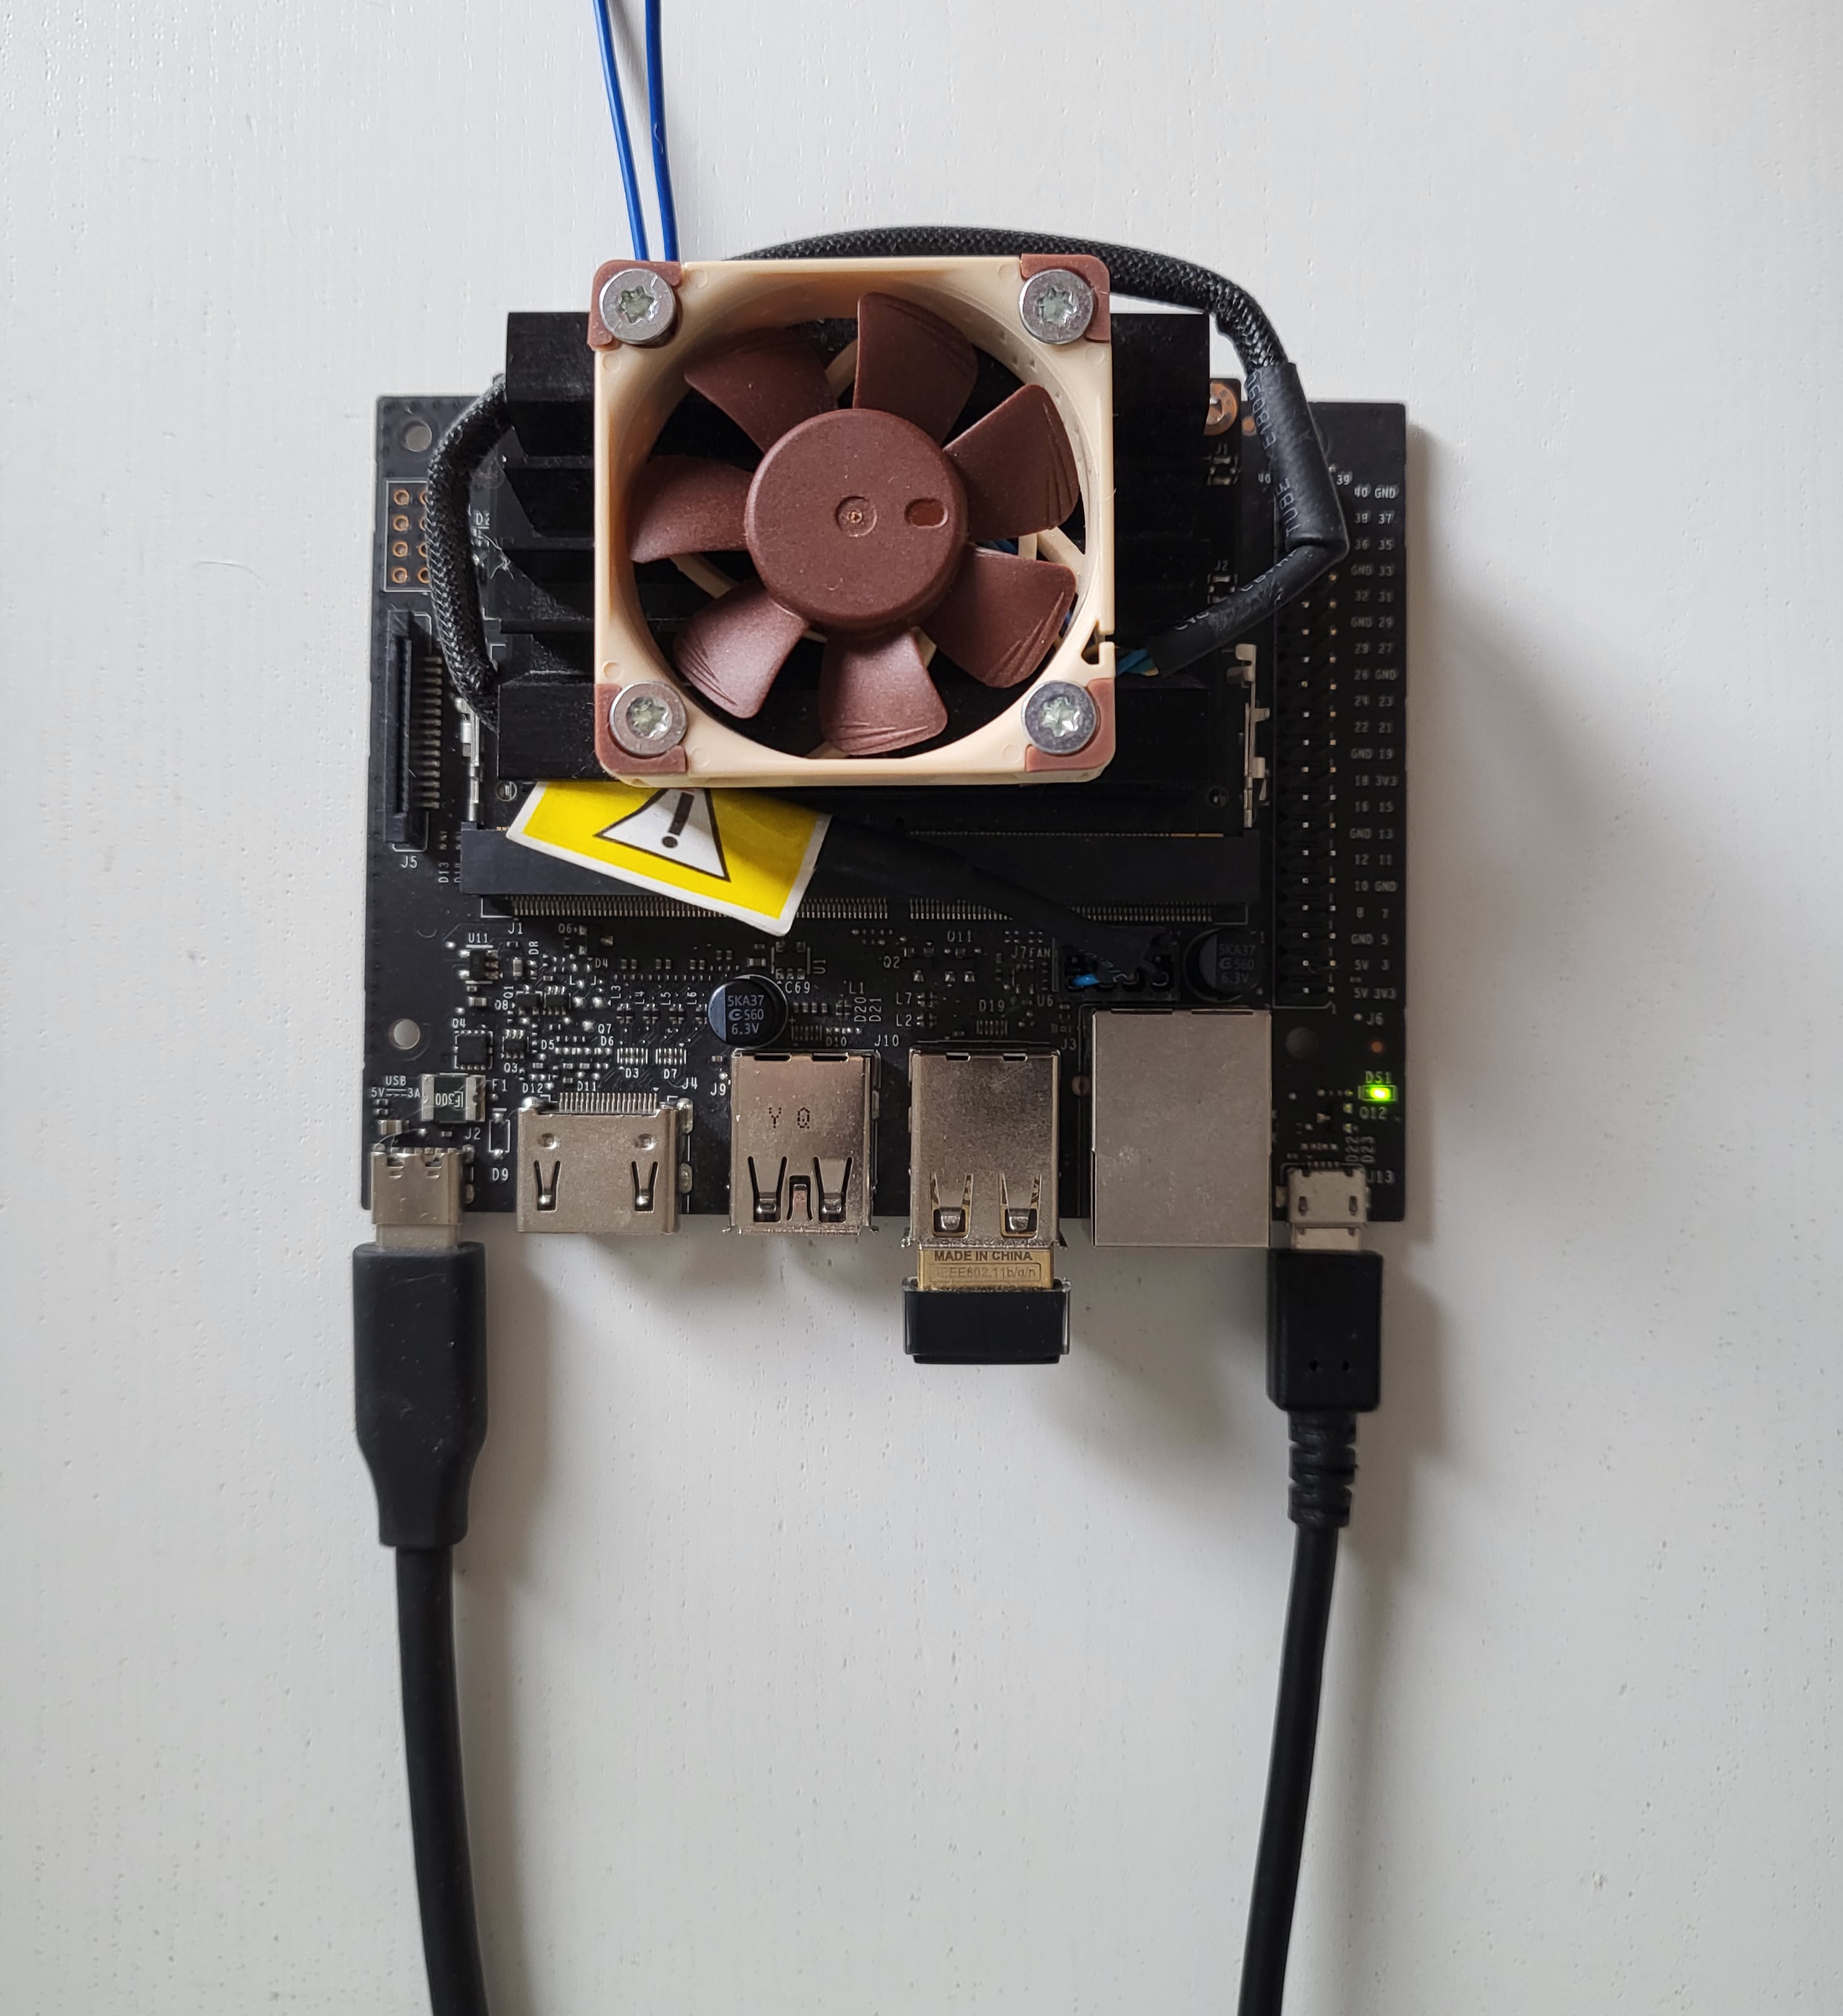
Detect the Jetson Nano
Your screen will be black which is the correct state it should be in. We want to have it connected on the power source and the data USB (far right) so we can run our flash script. After the usb cables are connected we can run a libusb script to check it out:
lsusb
This will give us a list of active and connected devices. We should see Nvidia as one. What the doflash script does is it automatically checks for a jetson device and begins the flashing procedure. You should see something like this:
lsusb
Bus 006 Device 001: ID 1d6b:0003 Linux Foundation 3.0 root hub
Bus 005 Device 002: ID 8087:0029 Intel Corp. AX200 Bluetooth
Bus 005 Device 001: ID 1d6b:0002 Linux Foundation 2.0 root hub
Bus 004 Device 001: ID 1d6b:0003 Linux Foundation 3.0 root hub
Bus 003 Device 004: ID 0b05:193b ASUSTek Computer, Inc. ITE Device(8910)
Bus 003 Device 003: ID 0b05:1866 ASUSTek Computer, Inc. N-KEY Device
Bus 003 Device 005: ID 0955:7f21 NVIDIA Corp. APX
Bus 003 Device 002: ID 046d:c539 Logitech, Inc. USB Receiver
Bus 003 Device 001: ID 1d6b:0002 Linux Foundation 2.0 root hub
Bus 002 Device 001: ID 1d6b:0003 Linux Foundation 3.0 root hub
Bus 001 Device 001: ID 1d6b:0002 Linux Foundation 2.0 root hub
This is what it should look like:
Flash the Jetson Nano
We can now flash the jetson nano. Let's run our script in our tegra-flash directory:
sudo ./doflash
Our output is quite long and it may take a little bit. After it is complete it will restart your Jetson and we can remove the jumper cables, cap or if we had our screwdriver we can just make sure we took it off after we used it in the first step. With that complete we can checkout the progress.
Checkout the setup
Since we are using Yocto's Sato image it basically gives us a base OS with some games and such, but we really don't want that do we. We want to boot it into our own application whichever it may be.
Custom application
The main issue we run into with this is we need to have a compiled application that we then therfore tell our image to incorporate into. Preferrably during the bitbake image build phase. After that we can create some github actions to pretty much do an OTA update and automate the build and deploy process. With that in mind I recommend reading over the documentation if you had any questions and also ask below if you may need any help. No changes were made to the Nocto repo except a pointer to this post. I might add a summarized step later. In the next post we will go over making some changes to the Nocto projet and adding our own layer to clone our built application and do some other minor fixes to really polish this thing out. Until the next post.